Friday, February 15, 2013

Copy Cat Addition

Hey guys! It's been FOREVER but I'm back and happy to say these past two weeks of getting my butt kick by school have come to a close. I was so busy I barely had time to paint my nails let alone take pictures of them. I did manage to squeeze in to replications of some really gorgeous nail art I've seen in the last few day.

First up is the the Heartbreak mani done by Work/Play/Polish, which I just fell in love with. Her work is always beautiful but something about this play on a V-Day mani really blew my socks off. I opted to go with a super hot pink base and really love how these turned out. The matte finish takes this look to a whole new level!


Base: Sally Hansen Sonic Boom
L.A. Colors Art Deco Striper Black and White 

Next up was the Love and Heartbreak mani by the Manicurator. Boy talk about hot and spicy! Less is defiantly more when it came to this one. Her color combo was perfect it was a sexy manicure that would be perfect for Valentines Day with out going overboard. Since Valentines Day has passed and I really wanted to break in a new color decided to go a little bit darker. I really like it!


Base: Essie Going Incognito 
Accent: Cult Nails Fetish 

Tuesday, January 29, 2013

Skittlespiration

Okay so Skittlespirations isn't a word but my blog my rules right? While blog surfing I came across a fun contest that I (after much deliberation) decided to enter. Kelsie from Kelsie's Nail Files asked contestants to create a design from an image on her Pinterest Board.  Here's what I came up with and the image it was based on. 


Pointer- China Glaze Liquid Leather
Middle- Cult Nails Cruisin' Nude, Chine Glaze Liquid Leather, Born Pretty "Glequins," Essie Good as Gold
Ring- China Glaze Liquid Leather, Cult Nails Cruisin' Nude
Pinky- Cult Nails Tempest, Konad Red Stamping Polish, BM-313


So what do you guys think? I thought it turned out pretty good. Wish me luck!
P.S. I forgot to mention that the cascading glitters came from and idea I saw on The Illustrated Nail's tumbler. Her work is seriously breath taking. 

Sunday, January 27, 2013

Cult Nails 2nd Anniversary Collection!


Happy Sunday people, hope your weekend has been as relaxing as mine. You may are may not have heard about the release of Cult Nails Anniversary Collection last week, and I was very excited to see that mine arrived in the mail yesterday. Now it's no secret that I love me some Cult Nails, so I didn't hesitate to snap up my own set of this collection as soon as it hit the net. 

  
First up is the ultra creamy Tempest. It's a self leveling high gloss white that applies that butter. I used two thin coats to get complete coverage. Keep in mind that while the formula is amazing, the color it self is very plain. It's geared for nail art and stamping so if the price tag is a little too steep for you, opting for a trustworthy drug store brand is the way to go. 


Next up is Blaze, which is a micro glitter made up of gold copper and silver suspended in a clear base. As a micro glitter, the coverage is even and relatively smooth. It does take quite a few coats to build up the opacity, which may lend toward a certain thickness if you don't keep your coats thin. I didn't have any problems with this particular application though so I can't complain. For today I wanted to swatch Blaze over another color in the collection, but after experimenting on a color wheel this beauty looks stunning on a variety of richer color. It's warmth really sets pinks reds and oranges on fire. 


 And, last but not least is Fetish the star of this collection. With an absolutely stunning wax finish this black is a game changer. Fetish has a fantastic formula and quick dry time, it also only requires one coat. I can already imagine the fun color combinations this finish will inspire. 


Sooo? What do you think? Another excellent collection from Cult Nails, or have polishes with interesting finishes run their coarse? 

Friday, January 18, 2013

Matte Finish

This was a busy week for me and I'm very glad that it is Friday and we have a three day weekend to look forward to! To celebrate I chose something simple and glittery. I've always been a fan of the matte finish and Essie Matte About You was one of the first bottles in my ever growing collection. I have since fallen in love with just about every shade that ManGlaze has produced.


 Since Sparkling added some shine to my tips, I finished these guys off with a thick coat of Essie's Matte about you. I love it! How about you guys, what is your favorite finish?

Base- ManGlaze Ilf
Glitter- Revlon Sparkling
Finish- Essie Matte About You

Tuesday, January 15, 2013

Stoneworks and My Left Hand

School's back in session and it is COLD down here in Texas! I should be getting started on all my chapter one readings, so I'll make this quick. I felt like making a more subtle textured look and ending up using some more muted tones that complement the season like browns white and grey. Using a make-up sponge I dabbed on brown and white then went over both colors in the nude I used for my base to soften it up. I also did some light branch and leave stamping in gray just to build it up.


I like the end result so much I left it for a whole day before and went back in and added some more stamping. I revisited a previous look and  added scalloped tips to all but my accent finger. Then using a dotting tool I added a border. Of course my top coat smeared it a bit but other then that I'm pleased with the result.


I also decided to switch up the base colors a bit on my right hand and come up with this combo. I don't show my right hand much but I promise it exists : )


Now back to work. Until next time ladies. 
Base: Cult Nails Cruisn' Nude, ULTA Snow White
Left Hand Sponging: Essie Mink Muffs, NYC Sidewalkers, ULTA Snow White 
BM-314, BM-15


Thursday, January 10, 2013

All the Tape and Then Some

 Well the back to school  count down continues and to combat the chilly whether and first day back jitters I wanted to do something bold and bright. So this is what I came up with.


I really love the contrast between the my stark white base and the vibrant red. I used striping tape to get the lines as crisp as possible and for the most part it came out pretty good. While I loved the white and red combo I still wanted to spice it up with even more color.


Using a bright a sunny yellow to fill in the white circles was my next step. Initially I worried about how I could make perfect little half moon circles, so I used a large white hole punch and some tape to make the outline. In person, I'm guessing because I see it upside down, the whole affect looks very abstract with a Japanese flare. In the pictures it looks like a close up of a flower, with a yellow center and red petals. Anyway you look at it I love the end result. What do you think, is this something you would try? 

Base-ManGlaze Mayo
Red- Cult Nails Evil Queen (love this color!)
Yellow-American Apparel  Sunshine State 

Monday, January 7, 2013

PVA Base Coat

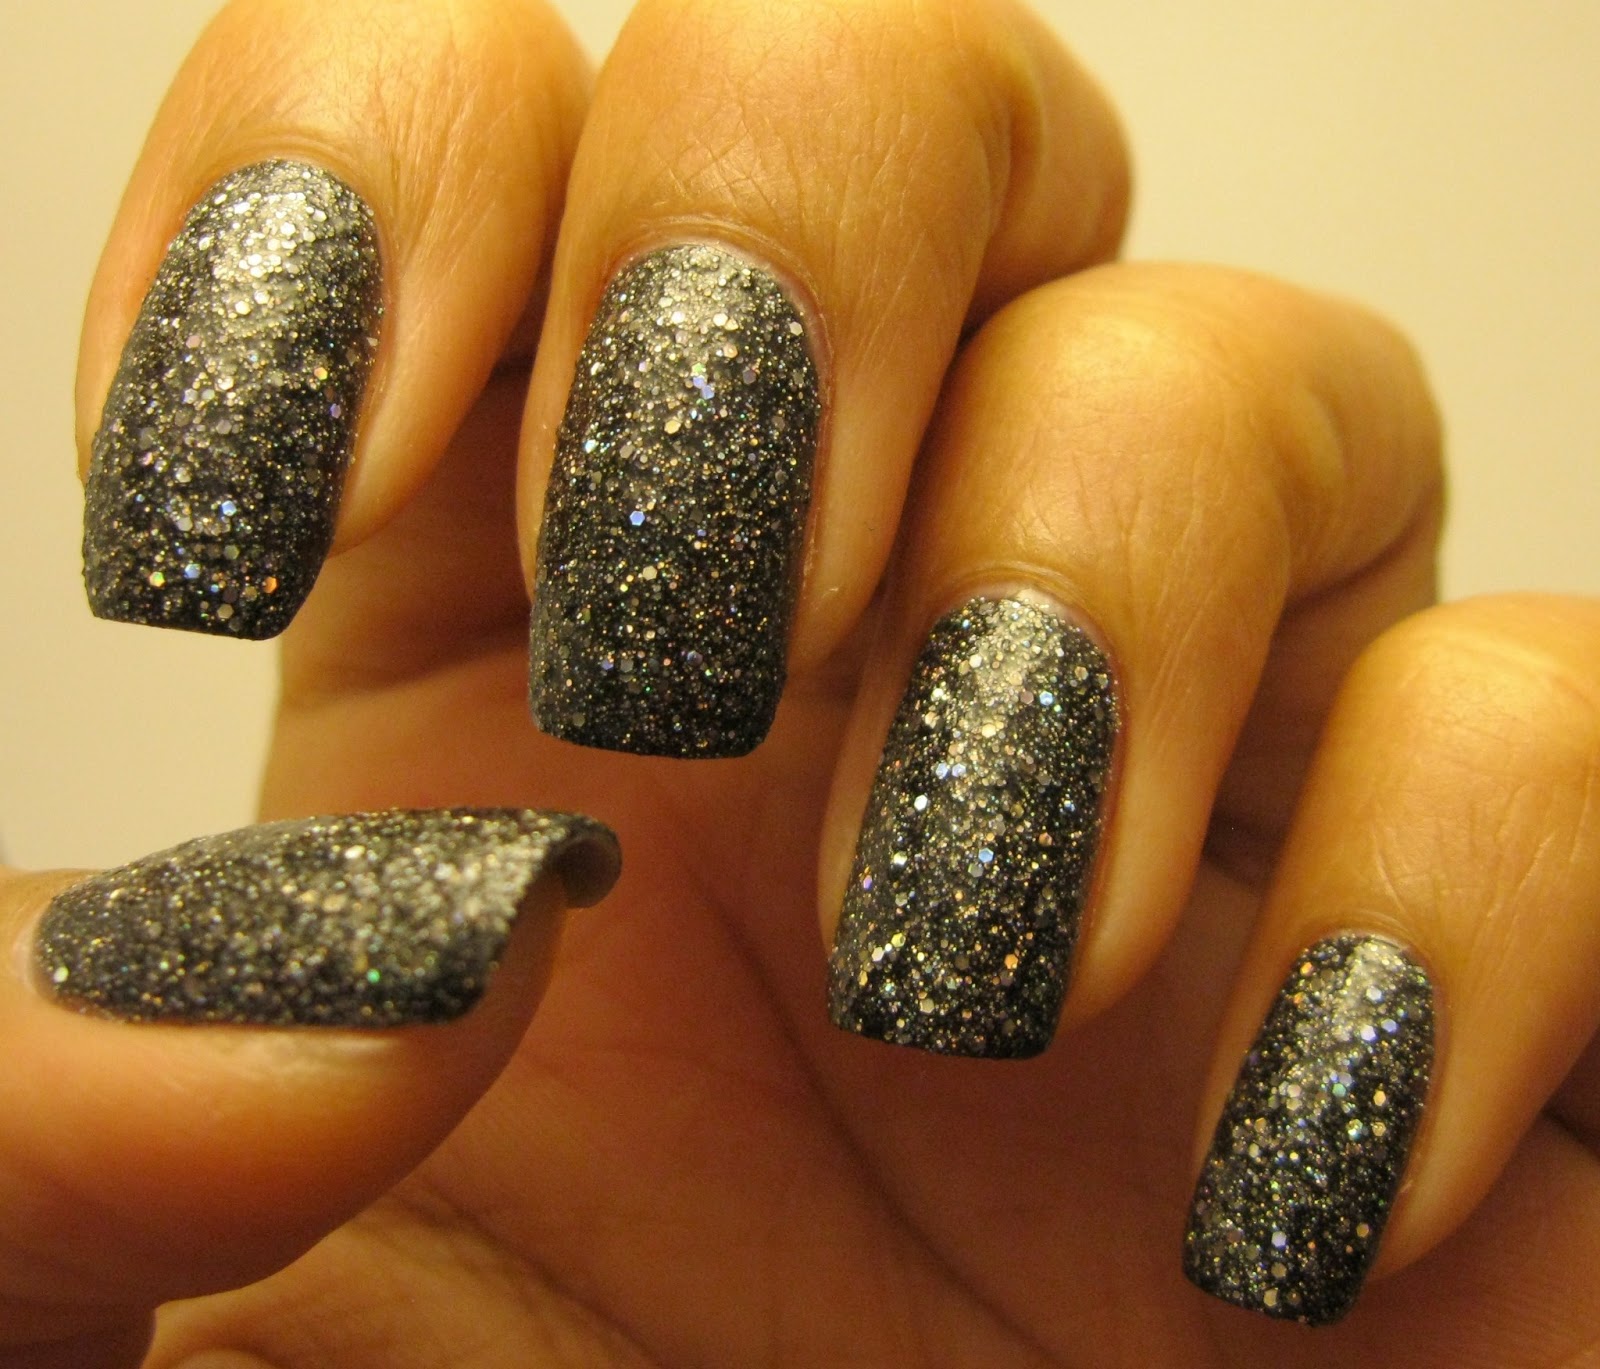
Happy Monday peeps. This time next week I'll be back in school and while that is a slightly saddening thought I'll endeavor to make this last week of break count! What could help me out with that more then polish right? Today I wanted to do two things, first use an untried glitter bomb and second test out a PVA base coat. If you haven't heard of a the awesomeness that is the PVA base coat well drum roll please....... it's craft glue. Remember that white Elmer's glue you use to rub on your hand and let dry so that you could peel it off and look at the wonder that is your palm? Yes, that stuff. Who knew it would once again find it way into your heart and back on your hand. Pretty Purple Polish has a very informative post on not only what it is but how to use it. She does use a different glue then I did but my results where exactly the same. The polish I experimented with is Anise Flashbulb from their winter collection, which can be purchased at DSW for $6. The entire Anise Nail Fashion line is free of Toulene, DBP, Formaldehyde, Formaldehyde Resin and Camphor. Not only that, they do absolutely NO animal testing. 


Flashbulb is a jelly based black with silver and holographic hexagonal shaped glitters. I'd head this polish described as thirsty from the amount of top coat need to smooth it out and boy was that accurate. I added two coats of Wicked Fast and decided to just let it be since I really wanted to experiment with the removal process. 


This is the only way I could begin to break down the shimmery goodness of the polish, forgive my lack of photographic prowess.  


You can kind of get a good impression from this picture above, with flash if you don't mind my blinds in the background.


And finally, since I was going to reverse happy hour with some friends I decided to add some square and circle studs from Born Pretty to make a little heart shape. Of course I like to pretend that this was purely for the sake of  curiosity. Could this nail base support nail art? 


Yes, yes it could. All in all I'd say PVA is a cheap and effective way to enjoy any glitter polish, and I will defiantly use it again.


Friday, January 4, 2013

Typography

Morning ladies. Hope everyone had a wonderful holiday (Christmas or otherwise) and New Years. I loved hanging out with the family and getting a nice long break from school, I also love the polish I found under the tree! The only colors I've been able to dabble with thus far are from Cult Nails and The New Black. While I try to heavily guide my wonderful boyfriend in the selection he makes for my Christmas presents he always surprises me with what we like to call "wild card" gifts. This year mine was the Typography set which you can find at Sephora. More after the break.


These print nails maybe old hat to some of you guys but I've never got a chance to try it before and boy to I love it! The technique is super simple and the end results are stunning. Props to who ever was in charge of selecting the shade of nude that was used in this set because it it truly beautiful. Now this was the fist time I've worked with this brand before and while the end result is great actually painting with this polish is not so great. The polish is a tad thick and need a very steady hand to apply evenly. Top coat helps of course but I was worried. I happened to come across this post from Piece of Pie and immediately fell in love with what she had done and decided to give it a try with some old decals I had. I can't lie I wish I would have gone without the decals because I think it just takes away from the rustic old-timeyness of the print. Anyways, The New Black has a YouTube channel where they show you how to use their sets and tutorials on various nail art. Here's the typography video.  


Also a friend of mine was attending a wedding and asked if I could do her nails and these where some of the ideas I cam up with based a picture of the dress she sent me. For some reason the only picture I can find of these was the one I posted on Instagram, but at least it give you a side by side of the nails and the dress. I personally loved the way my ring finger cam out but she really like the second gradient.

Thumb- Love & Beauty Taupe and BM-323
Pointer and Middle- Love & Beauty Taupe, China Glaze Liquid Leather  BM-314 
Ring and Pinky- Cult Nails Cruisin' Nude and BM-314.  

Saturday, December 22, 2012

Plaid?

Morning everyone. Hope everyone is having a great Saturday so far. Only four more days til Christmas, isn't that crazy. I feel like time is going by so fast these days. Anyone have any plans for New Years, or your New Years Mani? In the mean time I've had this color combination in my head for a while and finally got around to doing something with it. 


  I'm not really sure what this pattern is, some sort of plaid striping maybe? I can always count on striping tape to really come out clean and interesting. 


I'm pleased with the color combination. The silver gives these guys a festive air even though this light peach is pretty off season right now. 


The shade of orange I used in person is more on the melon side then straight orange but the lighting on these pictures don't really portray that. As an after thought I used the tiny holographic disks to add some additional details to this pretty straight forward design. What do you think? 

Base: Essie Loop Hole
Accent: Revlon Peachy

Tuesday, December 18, 2012

Cut Outs

I found these craft hole punches at Micheal's for super cheap and was excited to see the shapes they made where perfect nail size. By the way what's this shape called? I'm sure it's got a name it's just not coming to me right now. Anyways I used this particular shape to make a negative in some painters tape and got to work. 

 My nails are getting a bit long, I think it's time for a serious date with my nail file. Side note I asked Santa for a Cult Nails glass file I'll let you know if he come through ;) 
None of these pictures are in very good lighting but the accent color I used is a really lovely dark sparkly purple that pairs very nicely with the gold.
So all in all a very easy manicure but a tad time consuming since tape can always be a little finicky. Interestingly enough The Beauty Department posted this article today about the new Metallic markers that Sharpie had recently come out with and it just so happened that I had recently purchased those myself. Since  I had yet to use them I decided to go ahead and bust them out.  Of course, since I was using a stencil the markers didn't really get a chance to shine but they still worked out quite nice. The down side to using markers over polish is that, for me at least, the marker tended to smear when apply a top coat. This was addressed in the article but they seemed to have no trouble so maybe I'll have to try again. 

Base: Essie Butler Please & Anise Seductive

Friday, December 14, 2012

Some Fan Fun

Well I'm taking a quick break from playing The Walking Dead Xbox game to come post these bad boys so I'll make it snappy. Everyone has one of these right? Well then you can do these:


After letting your base coat dry dip your fan brush in any accent color and gently swipe it across your nails. THE END. Yea super simple but very pretty. I've seen girls use multiple color as an accent it look pretty great but tonight I just decided to keep it simple. I then traced a few of the line with my Art of Silver Milane   nail striper for some added glitz. I finally got my hands on some Cult Nails Wicked Fast and boy am I loving it. I'm still a Seche girl since it's so easy to come by but wow talk about a smooth finish. 

Base : Cult Nails Disciplined 
Accent: American Apparel Lopez Canyon